
LOW-COST VAN INSULATION
A Step By Step Guide For A Budget-Friendly InsulationInsulation is an essential step for your new tiny home on wheels. You really don’t want to mess it up and check in hotels when it’s freezing or melting outside.
When we had to start to insulate our Poldo (that’s how we called our van!), we were so confused; there are tons of info and guides online, but many of them are conflicting.
You will soon find out there is plenty of debate on the argument, and that reading guide after guide, you will end up being even more confused than you already were. And that’s awful.
So, we decided to write this guide. It’s easy, super beginner-friendly, and LOW-COST!
Hopefully, it will help you with your new DIY van conversion!
This article may contain affiliate / compensated links. For full information, please see our disclaimer here.
Choosing the right materials
Here we go, one of the most difficult steps: choosing the right materials to insulate your van. There is a wide choice out there. The choice depends on your budget, whether you want to live full-time in your van or just use it for holiday breaks, and what countries you will visit with your tiny home.
Let’s start by saying that we had a very low budget for our van conversion.
We decided to use a vapour insulation membrane (like reflectix), to prevent damp and mould growth. It also works as thermal foil insulation, and it is very easy to install. Moreover, it’s cheap! You can buy big rolls of this at an affordable price.
Right after installing it, we noticed the difference straight away: the walls were not freezing like they used to be before, nor super hot when the sun was hitting. However, we needed to live full-time in our van, so we wanted to make it as more comfortable as possible!
So, we installed expanded polystyrene foam sheets on the walls, attaching them on top of the foil. Polystyrene is an excellent insulation product as it has a high R-value, and it is one of the cheapest insulating materials. One of the cons of polystyrene is that it can retain water, however, this wasn’t going to be a problem for us: we installed it between the vapour foil and the cork walls!
Yes, that’s right! As I said, we wanted to be really sure our van was appropriately insulated. So, instead of going for the classic wood panels on the walls/ceiling/floor, we installed cork panels instead. This is way cheaper than plywood, and it’s very lightweight and soundproofing, and water-resistant. Well, that’s all we needed! And, being cork another insulation material, we were happy enough with our reflective foil and expanded polystyrene.
(More on creating walls/ceiling/floor with cork on the following article!)
So, the materials used for this insulation will help to create:
– A vapour barrier (to reduce condensation and avoid mould and/or rust)
– A thermal insulation (to make you super comfortable despite the season!)
– Sound deadening (essential to reduce road noises and vibrations)
Now, let’s jump to the materials list!
Shopping list
→ Vapor Thermal Insulation Foil
→ Expanding Foam (We had to use 5 of this!)
→ Cutter
→ Sikaflex
→ 3M90 High Strength Glue (Very difficult to find, but essential to attach the EPS boards)
STEP BY STEP


We decided to work from up going down, and that was a wise choice: the floor will get super messy, so it makes no sense to insulate the floor first. So, the first essential thing to do is to remove any panel and lining and van parts not useful for your conversion. Then, clean the van! You don’t want any dust, as the glue will not stick to it.
We also had to fill some small holes in the walls and floor before starting the insulation.
Once you’re ready to start your insulation, be prepared to get messy! All the gaps between the walls and ceiling need to be filled. We used expanded foam, as it’s cheap and easy to use. CAREFUL! Avoid putting foam near wires.
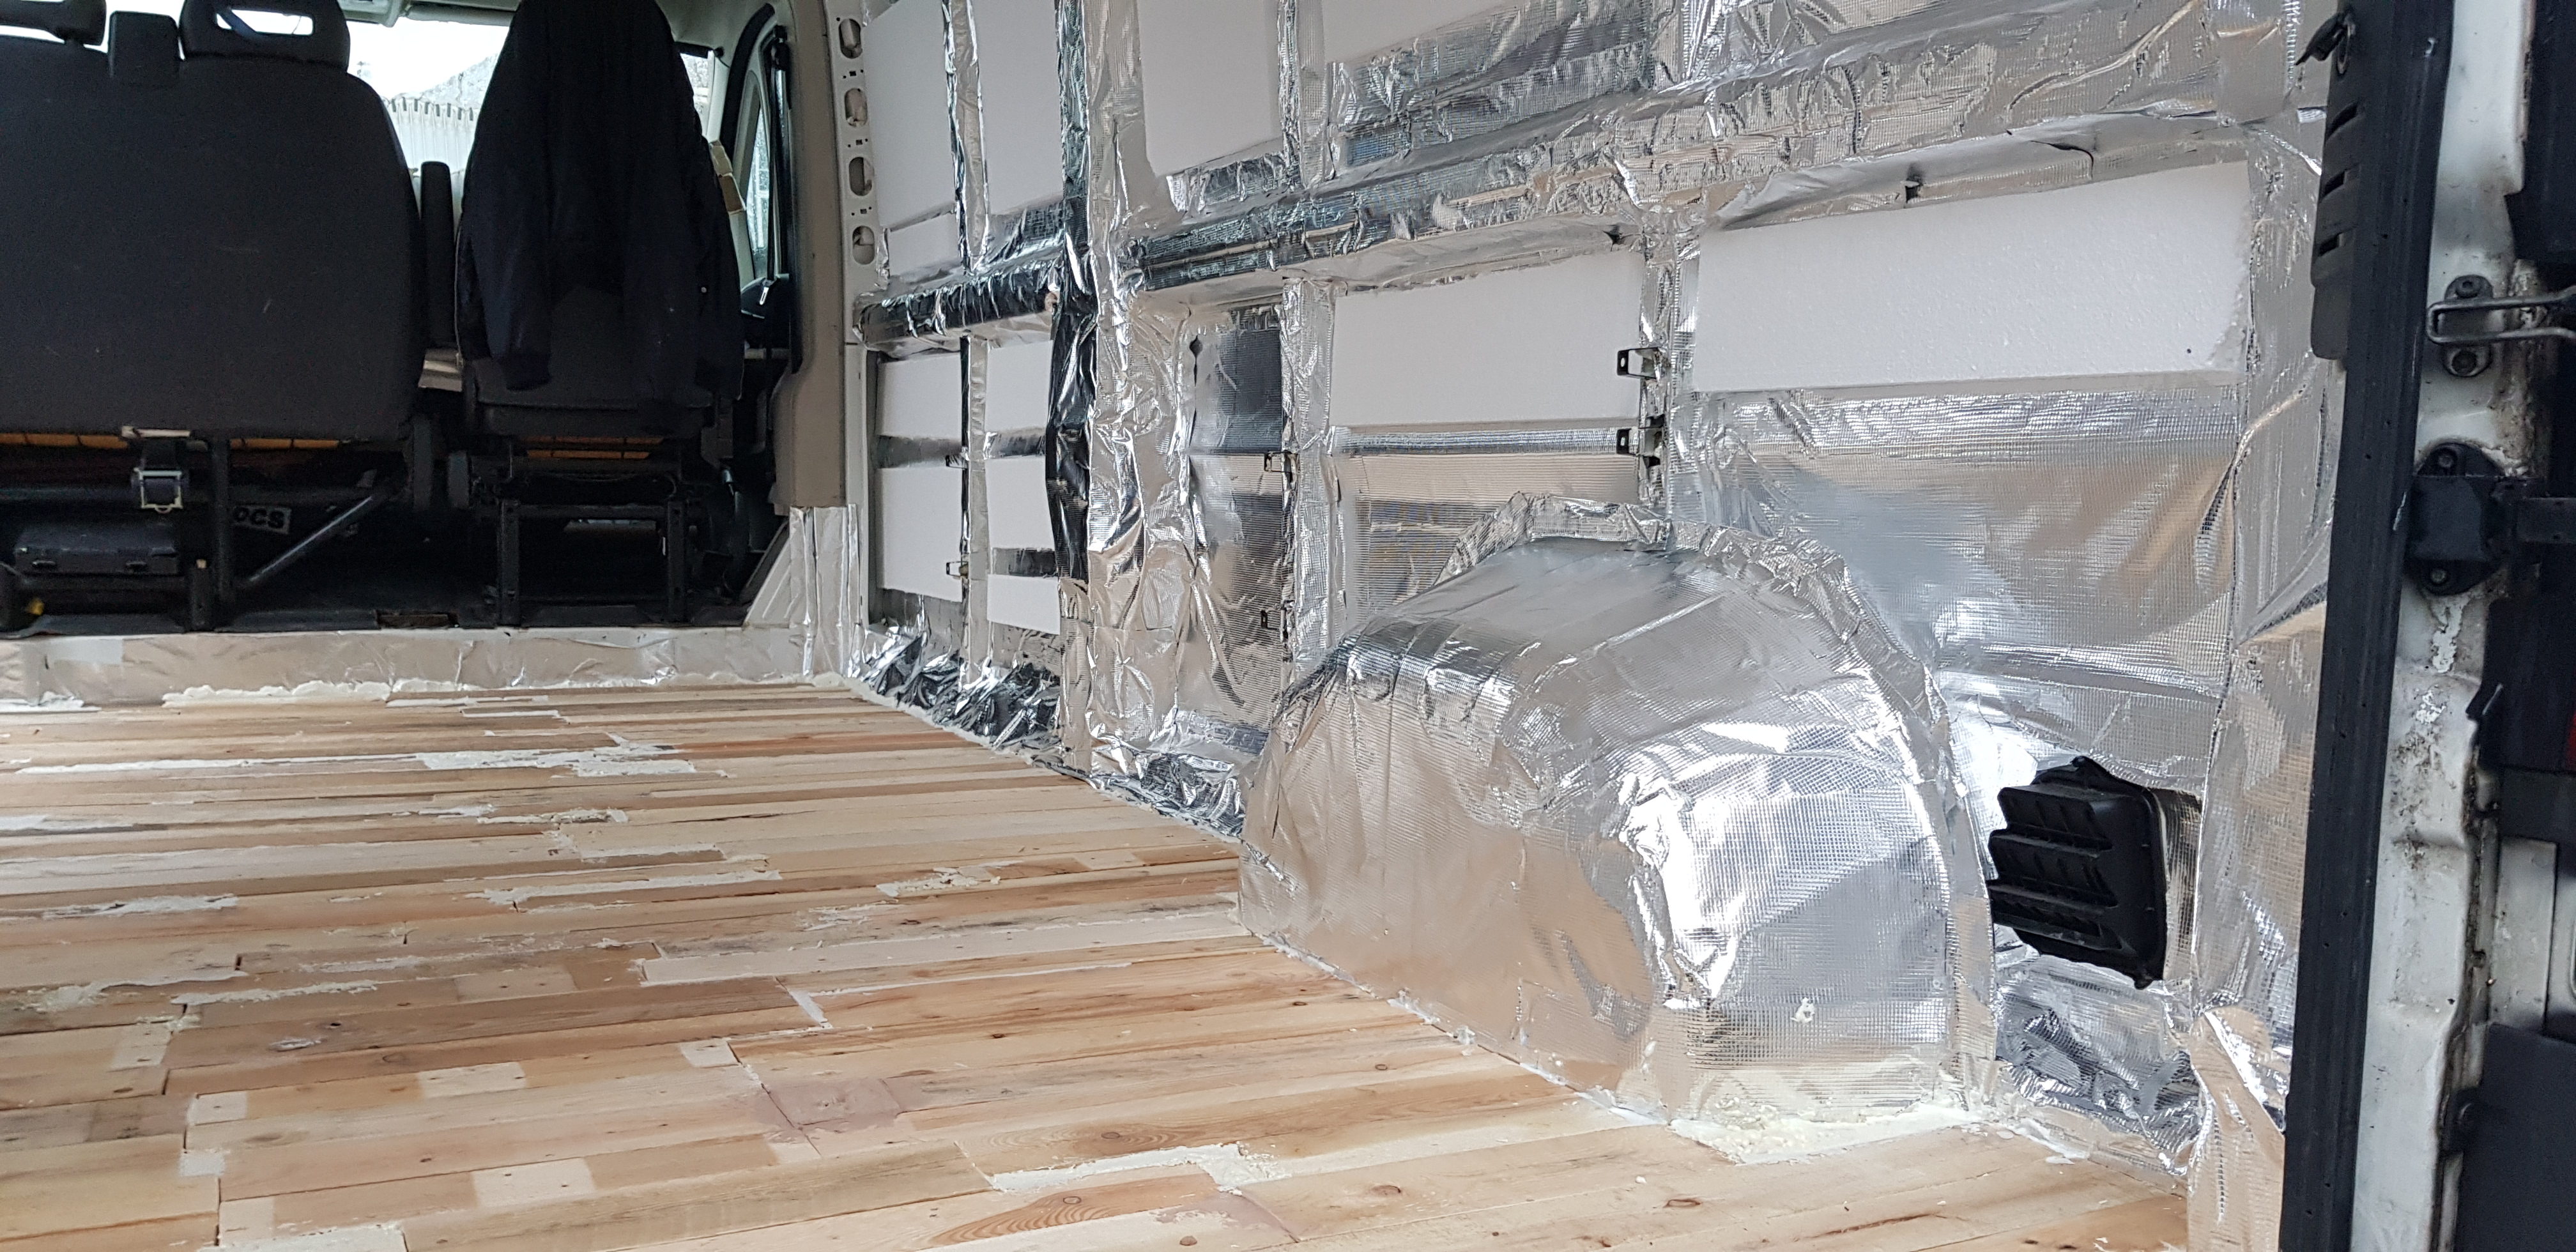
Once you’ve filled up all the gaps (it took us a few days), you’re ready to install the vapour barrier foil.
We covered ALL the walls, the wheel arches, the ceiling and the roof, but we left some parts where the wires needed to be accessible in case something breaks (ex. near the doors). You don’t want to break all the insulation to fix something later on!
The next step is to attach the EPS sheets to the foil. We used these only on the walls, leaving the ceiling only with the foil. We chose to do this because we will install a cork ceiling, useful for insulation and sound deadening anyways, and we didn’t want to lose too much van height.
Let’s see out to insulate your van step by step!


Steps:
→ Remove panels, lining, existing floors etc.
→ Make sure everything is clean before attaching the material to it
→ Make sure there are no holes on the walls/ceiling/floor. If you find any, fill it with sikaflex!
→ Fill all the gaps with expanded foam (avoid gaps with wires) and wait for it to dry
→ Attach the reflective vapour barrier foil (leave the gaps with wires)
→ Attach the polystyrene sheets (we put this only on the walls)
YOUR INSULATION IS COMPLETED!
Editor’s note: Before insulating your van, make sure there are no holes in the van body. You will probably find many, especially on the floor! Also, make sure to wear a mask (or two) when you use the glues. I was wearing one, we had all the doors open, and still, my head was spinning so much!
Tutorial video

We are curious about YOUR van conversion! Leave a comment below and let us know about your project!
![Cheap Van Conversion – The Costs To Convert A Van Into A Campervan [2024]](https://kikkasvoyage.com/wp-content/uploads/2022/04/mannaggiaaa-a-diooooo-1-400x250.jpg)

Kikka
EDITOR IN CHIEF