
Cheap Van Conversion
THE REAL COSTS TO CONVERT A VAN INTO A CAMPERVAN [2024]Thinking about buying a van to convert into a campervan and start travelling the world? Then you’re surely asking yourself the big question: how much does it cost?
Well, you DON’T need to spend a fortune. In fact, it is totally possible to self convert your campervan while also staying on a budget.
So what’s the truth about the average conversion costs? It really depends on what you want to do.
Keep reading to find out how much a campervan conversion REALLY costs, and how to keep it cheap!
This article may contain affiliate / compensated links. For full information, please see our disclaimer here.
Cost Of The Vehicle

If you don’t own a van already, this will obviously be your first (and biggest) expense.
Costs can go everywhere between £700 and £20.000+. I remember we looked for months before finding our Poldo, a 2012 Citroen Relay, which we bought for £3.700.
There are many things to consider when buying a van soon-to-be campervan. Let’s start by saying that the most common and basic vans for conversion are the Mercedes Sprinter and the Ford Transit.
The first thing you’ll have to consider when buying a van is: is there enough space to put everything you need inside? Consider WHERE you will want to put the kitchen, the bed and the toilet because these are going to be the most important things in your vanlife. Make a mental plan and consider whether the van you’re considering buying is big enough and if you can comfortably travel in it.
I remember that when we were van-hunting, we used to lay on the van floor to see if the bed would fit at the back of the van – leaving enough space for all the rest.
The height of the vehicle should also be considered: trust me, you don’t want to spend your days without ever being able to stand. This is one of the reasons we chose Poldo. It’s one of the highest vans in the market, and Kris could stand despite his height of 185 cm. When considering this aspect, don’t forget the space that the floor and the ceiling will inevitably take!
Another suggestion is: if you’re buying a second-hand van, go see it with a mechanic. We didn’t know exactly what to look for in the engine. We drove it for a few minutes before buying it, but that’s all. And, of course, after a few months, we had to spend £300 to fix a broken alternator. Lesson learned.
Average Conversion cost
Let’s begin with the short answer: the average price for a campervan conversion (considering all the necessary) is about £8.000.
We did it for about £4.000, but we could have spent even less if we were in another country where the materials could be cheaper. In fact, in the UK, you’re inevitably going to find yourself spending lots of money to buy the basic materials needed for the conversion! Suggestion: if you have the chance, do your conversion somewhere else, like Spain or Italy, if you want to keep your costs down.
A conversion can go anywhere between £3.000 to £25.000, depending on what you decide to do.
Staying withing our budget, we still managed to put a king sized bed, a TV, a kitchen table with chairs, a kitchen unit, a wardrobe and a toilet with a shower room. Not bad, huh?
Costs Breakdown
Windows, Vents, Skylight

When you start your conversion, this will be the first thing you’ll have to do. If your van doesn’t have windows, you’ll probably want to install some yourself; living in such a small space without any window can be extenuating.
Our van didn’t have any windows when we bought it, but we decided to install two rear windows and one lateral window. And I’m so happy we did! We went for the basic ones, which you can’t open. For security reasons, these are some of the best.
We also installed a skylight to add more light coming up from the ceiling and to open it when we want fresh air coming in.
Another essential thing are the vents: trust me, you want to add some vents in your van to avoid condensation and to not keep the smell in when cooking. We put two of them, one on the kitchen and another in the toilet (again, so glad we did!).
For all this we spent about £400, but the price can vary depending on what kind of windows/skylight you choose.
If you have no idea how to install your windows and skylight, don’t worry, I wrote a full guide about it. Check it here!
Insulation

The insulation is by far the part we HATED the most. It took us a month to insulate everything (we were also working at the time), and it was soooo boring! Nevertheless, you can’t avoid it as it keeps the van at a mild temperature regardless of the weather outside.
Overall, we survived good enough to extreme Scottish winter and a very hot Italian summer. Not sure we would have been here to talk about it without proper van insulation!
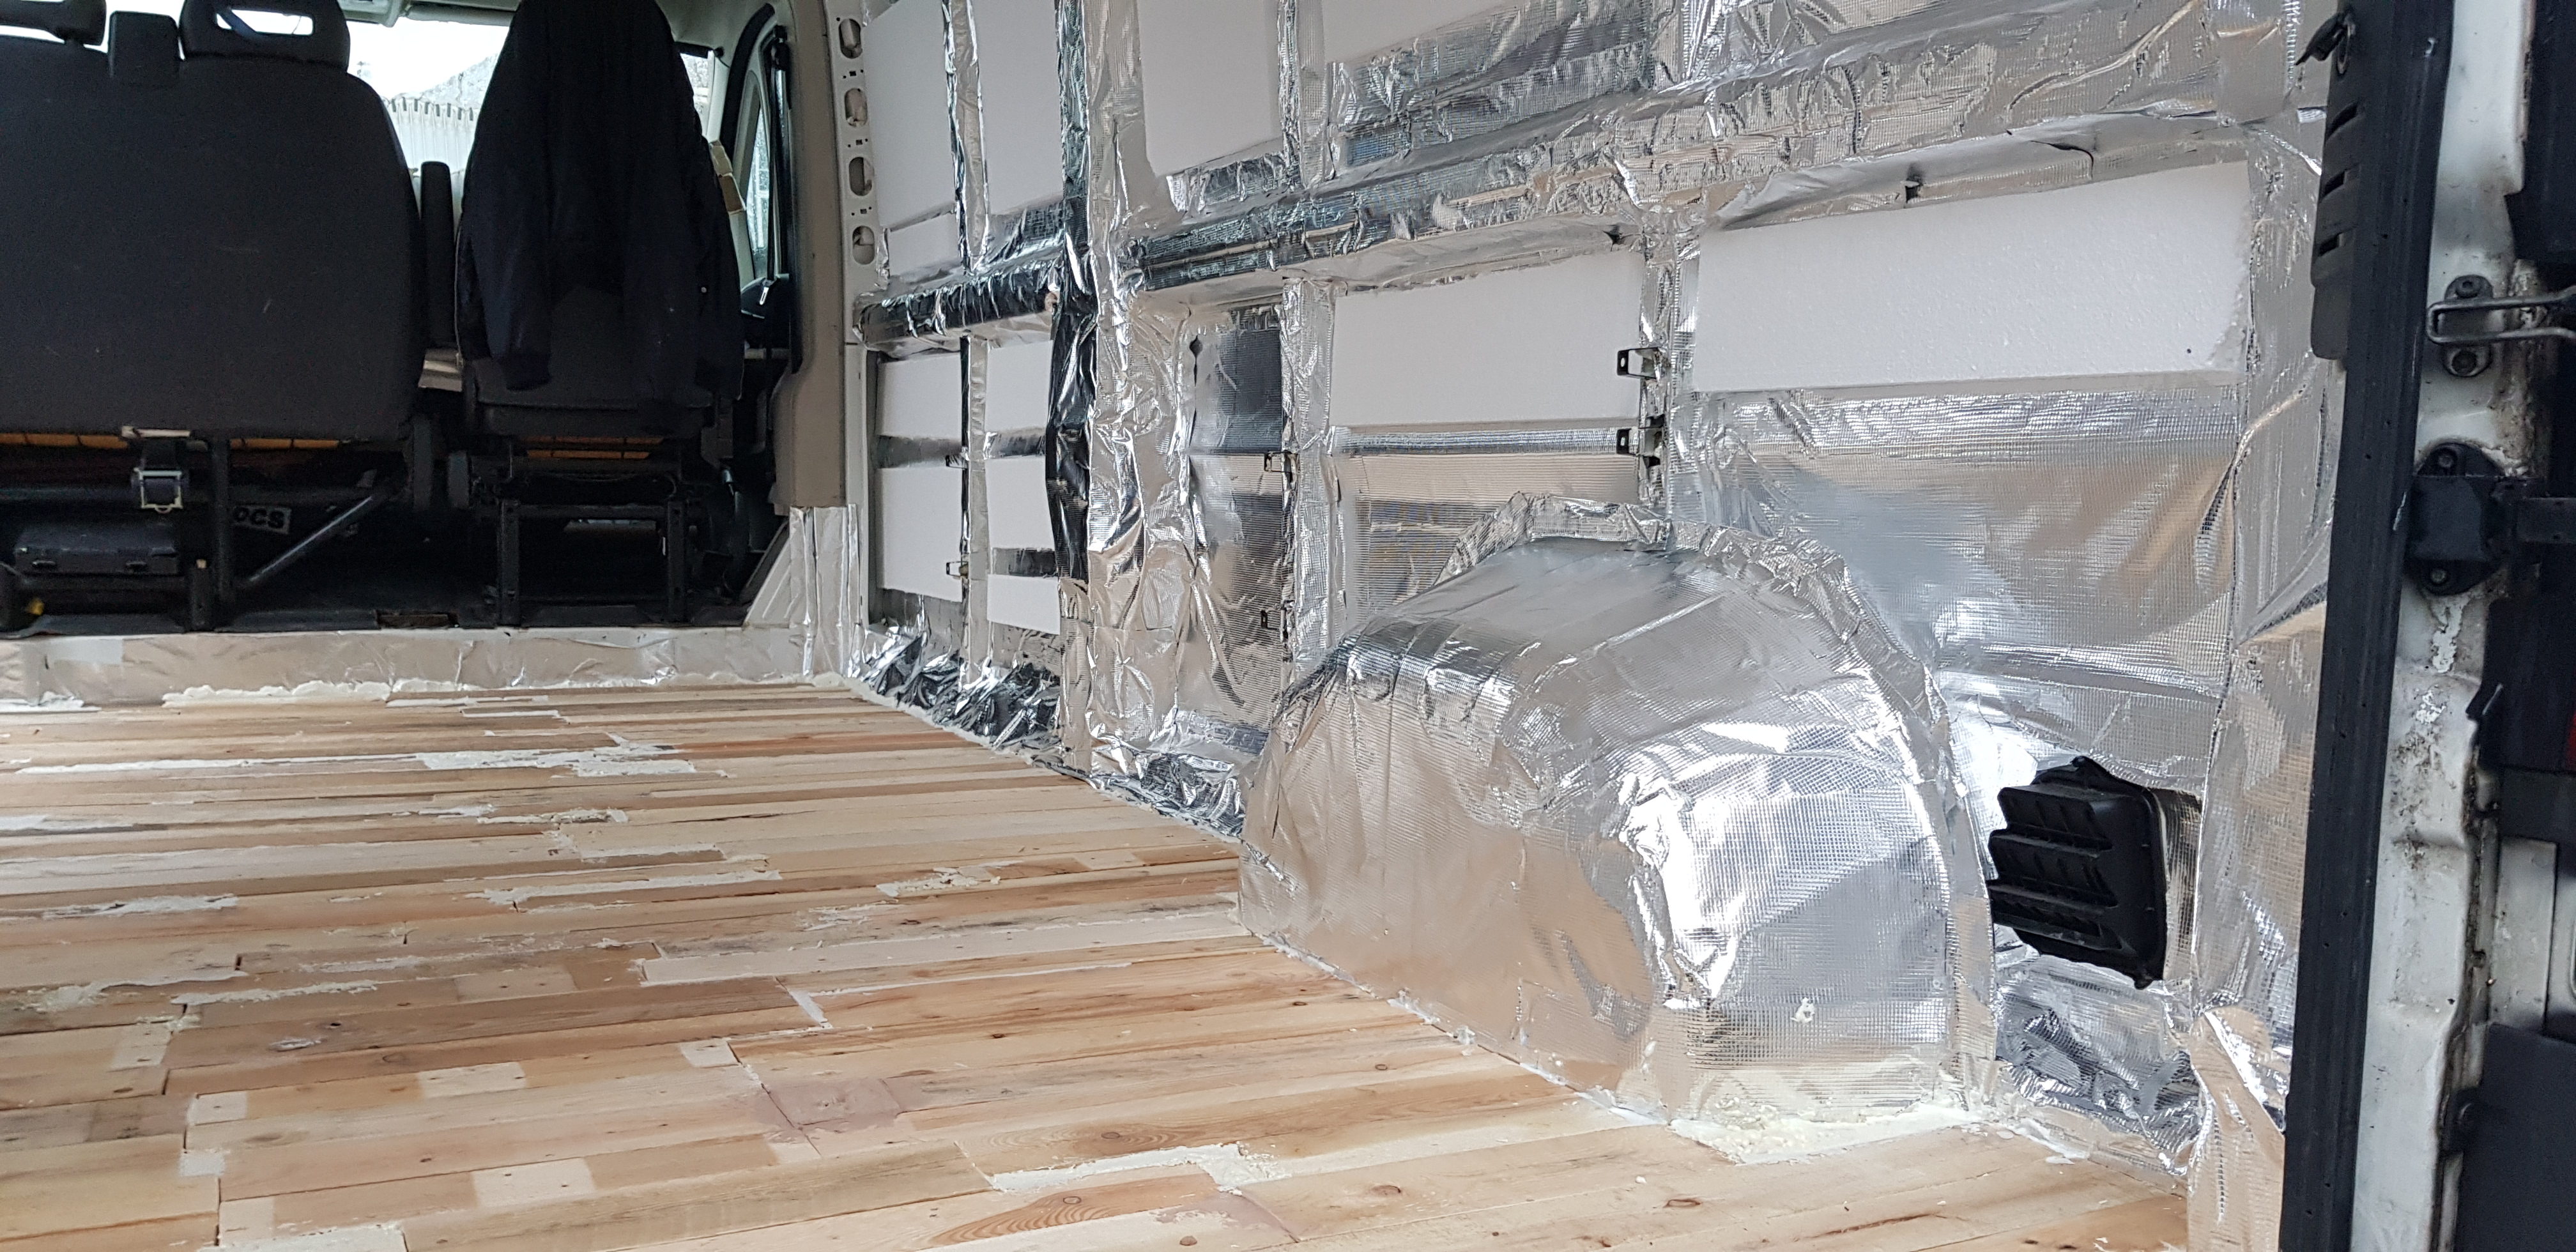
The insulation price can vary depending on what material you decide to use: bubble foil, aluminium foil, polystyrene EPS boards, wool, expanded foam… there’s just so much choice out there.
We chose to do various layers of insulation with different materials because we wanted to be 100% sure we could stay comfortable in any weather – it is, after all, our full-time house! We decided to go for the thermal aluminium foil for the first layer, covering all the walls, ceiling and floor. Then, we added the expanded polystyrene EPS boards to most parts – besides the floor, where we used cork – and filled all the gaps with the expanded foam. I know, that’s a lot, but… it worked for us!
The total spent on the insulation was about £240. Again, you can spend more than this if you go for more expensive materials, and a bit less if you use less insulation. It really depends on where you plan on going with your campervan and if you intend to live full-time in it.
For more insulation info, have a look at our Low Cost Van Insulation Guide!
Cladding & Flooring

This part is essential to laying out the structure of your campervan. Just as the insulation, here you can save a lot of money depending on the materials you decide to use. For the structure, we used free pallets that we collected from various shops around the city. We cut them and screwed them in the van structure where we knew we wanted to put the furniture. By using free materials you’re obviously going to save a lot of money, BUT you’re going to work more to treat them. This is definitely going to take more time than buying ready made materials!
We also glued the pallets to the floor, and covered them with cork, which works as underlay and improves the insulation. The total cost for our cladding and flooring was only about £40!
If you want to stay low on a budget but don’t have much time to spend cutting pallets, a good idea is to look on websites such as eBay or Facebook Marketplace: many people sell leftovers from their house, and you can find what you need for less! One of the most used materials for cladding and flooring is plywood, which (usually) has a very affordable price.
Remember that weight consideration is super important when converting a van: you don’t want to choose heavy materials, as weight adds up easily. Keep it light!
For a super-cheap DIY van flooring, check this article!
Furniture
The furniture is one of the most fun parts of the conversion! You can buy new ones that most represent your style, have a look at second-hand shops, or even build your own!
As we wanted to keep the conversion cheap, we decided to build our own with… again, FREE PALLETS! This is obviously going to take more time tank buying ready-made furniture, but it gives you the chance to fit everything perfectly and to make things the way you want them to be.
For the bed, we literally took the one we had home and fitted it in the elevated structure we created in our van. TADAAA!
The only things we bought are two puffs which also work as containers, a gas stove, a back seat storage, a toilet cabin and a few clothes boxes to organize our clothes under the bed. All the rest, we made it ourselves.
Important advice: always keep in mind that your space is going to be very limited, so try to create several storage options to keep all your stuff!
Electrical
This is THE MOST expensive part of the conversion, and the most complicated one.
Turning to a professional is highly suggested but… we didn’t. And we didn’t have any electrical knowledge AT ALL.
That said, if you want to be extra sure to not mess it up (and trust me, you don’t want that), you might need some experienced help. But if you feel brave enough, you can still succeed. Make sure to read MANY guides and be extra careful when doing it. We spent a lot of time watching videos of other people making their electricity systems, and it helped us a lot.
Just take your time, be patient, and you’ll be able to do it too!
But let’s talk about costs now. Expect to spend anywhere between £700 to £4000 for this one. I know, that’s a lot, but… electricity doesn’t come cheap!
If you want to stay on a budget, these are the essential things you’ll need: an inverter (£100), one or two leisure batteries (£160 for two), fuses and cables (£30), fuse box (£10), sockets (£30) and a control panel (£40).
To live even better, I’d suggest adding at least one 100w solar panel (it would allow you to spend more time off the grid!).
Gas
If you’re planning on taking your van out for the winter (or to live full-time in it), you’ll probably need a heating system and be able to cook. Cold showers in winter? Not the best!
As our goal was to build our conversion as cheap as possible, we gave up on the heating system. We decided instead to spend a bit more to make proper insulation, and it worked pretty well: it’s still pretty livable during winter, despite the (very) low temperature outside!
As for the hot water, we do it the old way: during the cold months, we boil the water and put it in a tank with an immersion pump connected to the shower. Et voila’, hot shower!
The only thing we use our gas tank for is cooking. We installed it under the kitchen and connected it to our gas stove, and it works perfectly. You don’t need to be a professional to do it, you can easily understand how to do it by yourself.
A 50kg gas tank will cost you about £80, and it will last for about 4/5 months, depending on the use.
Water System
The price for your water system will vary based on your water usage, how many people will be in the campervan and if you’ll have a shower. To estimate how much water you’ll need, make a list of all the things you use water for: washing dishes, showers, cooking… and calculate which water tank would best suit you.
Overall, for a basic water system, you’ll need one or two water tanks (£15 each), one or two waste tanks (£16 each), tubes (£7), and a water pump (£60). We bought all of this from Amazon, for a reasonable low price (less than £150).
Toilet / Shower Room
This was the one thing that, despite doing everything at low cost, I couldn’t give up on.
We bought this porta potty from Amazon, and I’ll never stop saying it is one of the best things we bought for the van! I also met many people travelling full time without a toilet: trust me, they all regretted it after a few days.
Regarding the shower, we were not sure if we wanted an indoor shower room (taking up more space) or an outdoor shower. But because we begun the vanlife in Scotland, the temperatures did not allow us to take showers outside… that would be just crazy. So, if you’re planning on visiting cold countries, definitely go for the indoor shower.
Our final choice was a portable shower, which we could use both indoors and outdoors. We built a shower room, making it waterproof and well insulated, and it really didn’t cost us much. When building a shower room, it’s best to use the same materials and paints suitable for boats, as they are very resistant and waterproof.
Conclusion: if you plan on building a shower room, consider about £200 to £400 for a basic one (this inlcudes waterproof underlay paint, waterproof panels such as vinyl, and a waterproof top coat).
For the door, we used a foldable door (£30), as it is one of the cheapest options out there and it’s easily cuttable and fittable.
Don’t forget the sink and the tap! You can find proper sinks and taps for campervans on Amazon or in dedicated shops.
The total for the toilet and shower room would be about £500.
Decorating

One of my favourite parts! Who doesn’t love decorating?!
The price here can vary a lot, depending on how you want your campervan to be and what materials you use. Just remember something: it will NEVER be completely finished. We’re still changing many things and renovating it while living in it. The truth is that you really realize what you need only when you start using it!
The decoration price should include basic things like floor and wall …, curtains and lights.
We used most of the things we already owned (such as cushions, a few shelves and kitchen utensils).
It’s a good idea to have a look in places like IKEA and Amazon, or eBay, Gumtree and Facebook Marketplace.
Remember that you will not need many things because the space is very small, but THINK STORAGE, always!
Security
When staying in a campervan, security is no joke.
Talking to other vanlifers, I found out that there are so many break-ins and stolen campervans in most cities! And that would really be a nightmare.
A good idea is to spend a bit of your budget on making your campervan safer. An alarm, a few labels, and a steering lock is basic security! We also added a GPS tracker to our Poldo, just to be extra safe.
For a basic security system, the cost would range between £100 and £300.
Are you considering the digital nomad life? Have a look at the guide below, and discover the 15 steps to become adigital nomad and earn your freedom!


Kikka
EDITOR IN CHIEF